Pizza Oven V1.0
Pizza oven eh? Like I didn't already have enough things on my mental 'need to get done' list!

This started way back in 2009! When we moved to our house (2007) there was a massive koi fish pond that was really hard to keep up, the water went green in days, cleaning the filter was a daily job and took ages to do properly and as we didn't want the fish to suffer with our lack of fish keeping skills and with children planned in our near future the pond would be far too enticing for them not to go in for a dip, so the fish were evicted, they soon found new homes and the pond was demolished and a patio put down in part of its place, there happened to be a strange corner that needed filling, and I had a load of concrete blocks laying around, so the obvious thing to do was build a pizza oven, mission creep at its best. My father helped build the patio, the base surround and floor of what would be the wood store underneath where the oven would sit.

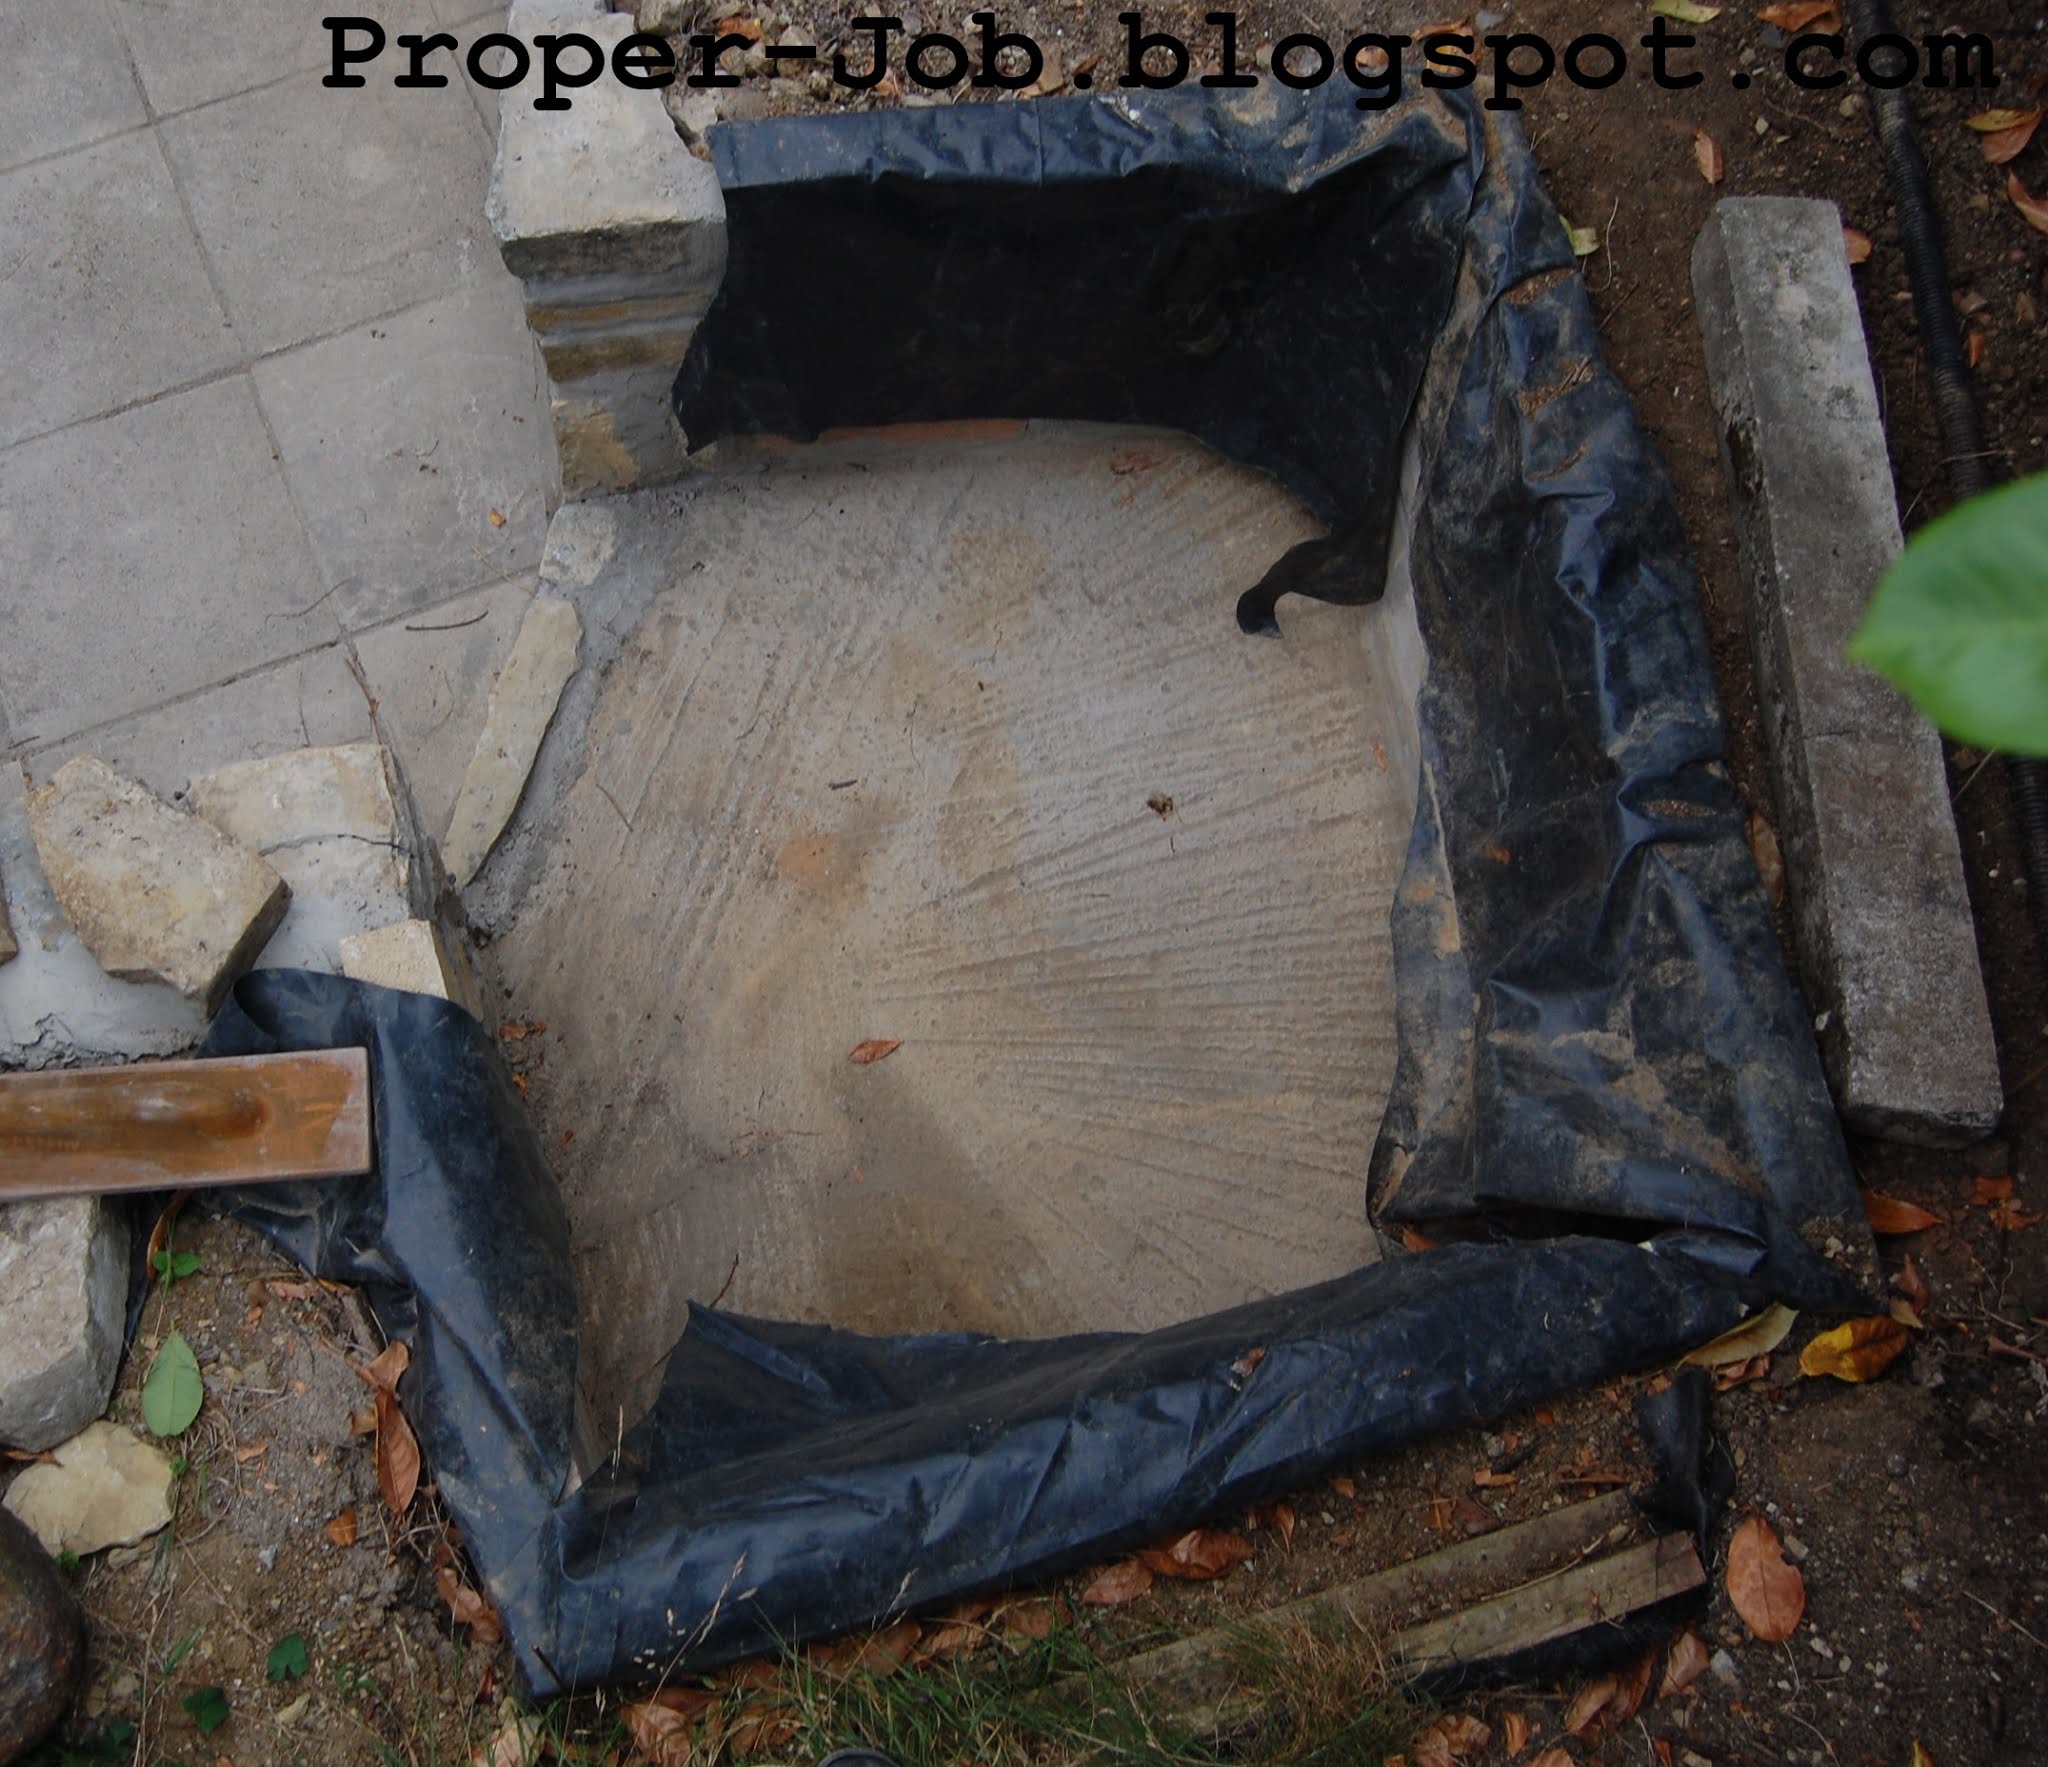
So from the photos you should see a base appear, I built a wall around and then built a wooden former for the concrete top, with the pond liner used as waterproofing, but it was then left a few years while other priorities took over (children) and funds withered away (again children). A mate ended up helping cover the cost of the slab on top for the temporary loan of my garage for him to repair his Jeep, and he also chipped in some elbow grease, thanks Darren!!!

The concrete base was then left a couple more years, again other priorities on time and money took over, then in April 2020 I was furloughed thanks to the Covid19 pandemic, this left me with lots of time to address many many many many things on my to do list, and invent lots of new ones to grow the to do list.

I had saved a load of bricks from a garden wall I'd taken down about five years earlier, also I had been given a load of building sand, and had some left over sand from previous projects so all that was needed was cement and some talent. I had to wait until lockdown restrictions were lifted a bit before I could click and collect cement from the local DIY centre but they didn't stock talent, so I adlibbed, and once I had started there was really no stopping me.
I had been given a book, as a kick up the arse I think, as the build had stalled for a few years, the book is called "Your Brick Oven - Building it & Baking in it" by Russell Jeavons (link below) This was a good read, and enough detail to give me the motivation to crack on when the time came, plus it has some recipe's for dough in it.
I had an idea on what I wanted to build, I had been thinking of fitting metal doors, this was kind-of a show stopper for a few years as I wanted to get hold of some before I started building, but the cost of and available funds never crossed paths, so I just bit the bullet and built it, and improvised with a wooden door for the time-being. The door is mostly used to stop creatures taking up residency as we're in a semi-rural location at the edge of a village. The initial requirement for wanting a door was to be able to seal it up and keep heat in to be able to bake bread, but I'll cross that bridge when I'm closer to trying, I have a plan to tweak the current 'temporary' door, more on that later.
The design and size was limited to the materials I had to hand, so a lot of measuring was done to figure the best format, it might not be the perfect size and shape, but hey, I'm looking at this as Pizza Oven 1.0, we'll use it learn from it modify it and if/when we move build another.
So from the pictures I cut a circular pIece of plywood to the internal diameter slapped it down, marked up (guestimated on what looked 'about-right') with some bricks the width for the entrance, mixed some morter, broke some bricks and went for it. I did two courses initally as the 'base'. I had a ton of old ceramic tiles and broken dishes and glass that I broke up and threw in to use as a heat sink, come heat reflector so heat didn't just sink into the concrete base and disperse, then levelled and pounded flat with sand on top.

The bricks I've used are two types, the dome is just made with normal house type bricks, and the internal floor is red engineering bricks led on their side. I've read that you need special fire bricks, but the engineering bricks were free, and have held up thus far, if they do start to fail they are only laid in on sand so I can pull them out and replace them come the worst.
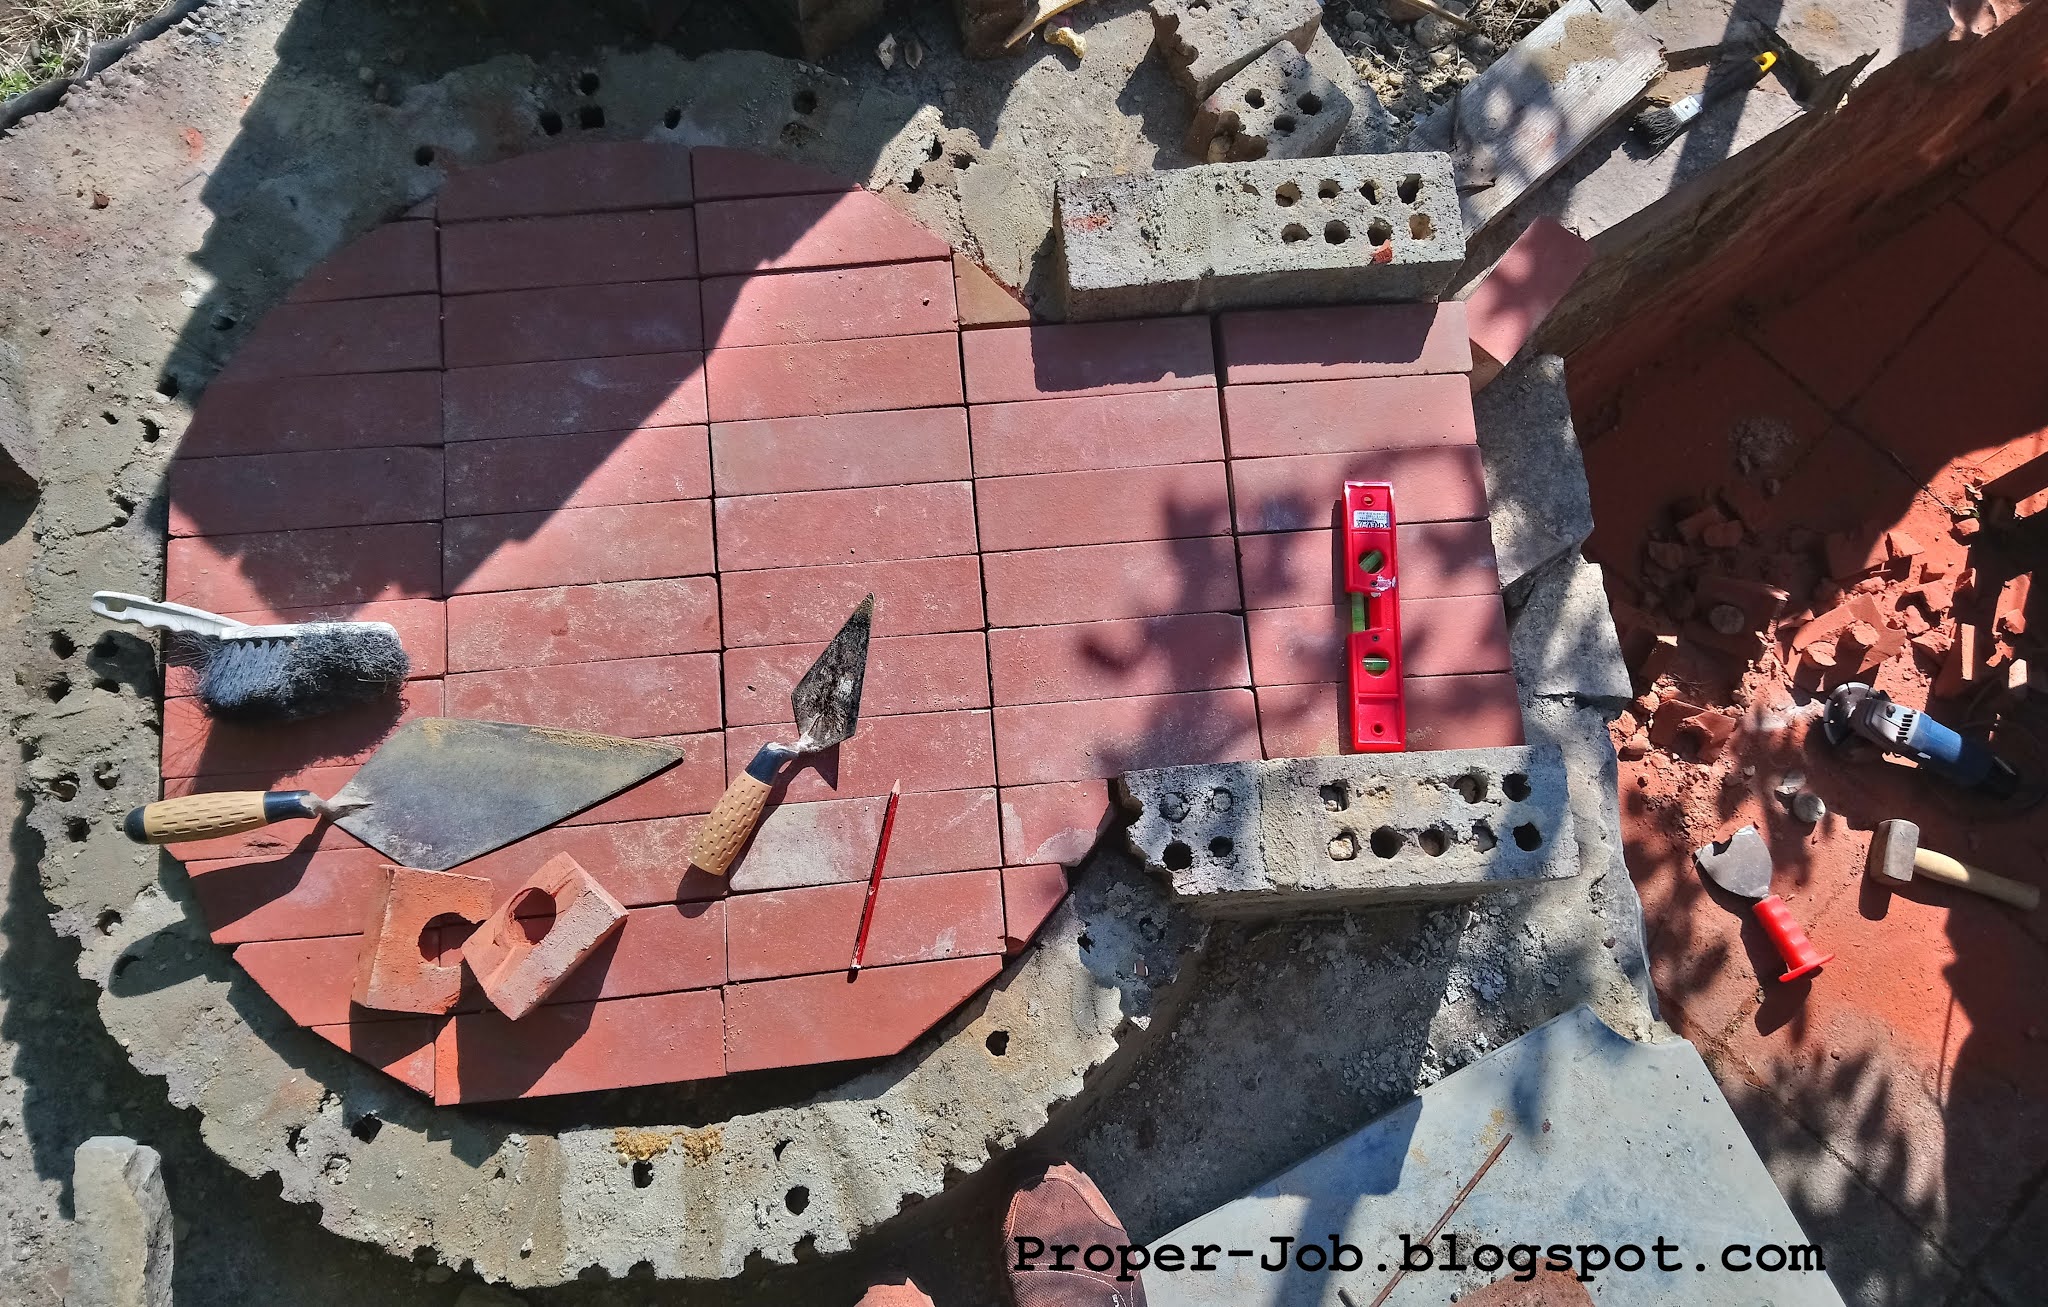
I laid the floor inside before I continued with the dome, I just used a bolster and lump hammer to break the grey house bricks, most successfully split into two, others didn't fair too well and just shattered into many pieces, I guess the price to pay for re-using old bricks, I knew I had about 15 bricks more than I needed so I didn't mind a few going wrong.
I built up the arch completely before I raised the dome to the same level, it's the easiest way I could mentally envisage linking the dome with the arch, seemed to work out well.
The circle template I used as a template for the base I cut out the corners, so to speak, leaving a cross so that I could lay it on the oven floor and leave it there until I'd finished the dome, but there was enough left to be sturdy for my guide, but not so sturdy that I couldn't break it to remove it from the inside once done if I had to leave it in.
The guide I made using a length of scrap wood fixed to the swivel base of a trolley wheel, I'd bought four of these for another project so just unbolted the wheel, fixed it to the now non-circular-cross-type-shaped template then added the length of scrap wood to that, then a smaller piece of the template ply to the end to make a 90 degree guide for where the outer brick should be.

The guide was used for the next four courses of bricks, I was doing two courses per day, in the heat of the summer, I'm used to driving computers, and although not completely unfit bending over all day in what usually ended up being the midday sun quickly took its toll. The oven eventually got to the point where I just couldn't get the bricks to stick as it was at such an angle gravity got the better of them. I needed a new plan and it had to be a cunning one.

I found some concrete blocks and some off cuts of foam insulation, basically anything laying about that I could fill the void and shape the top of the dome with, but I would then be able to remove through the opening at the front once the dome was complete. I used sand to build up the shape of the inside of the top of the dome, allowing me to finish the top four courses of the dome without it collapsing in on itself.

For the entrance arch I built a wooden arched former of offcuts of thin ply that I had been tripping over in the garage for a while, using this I could lay the bricks on top of it without having to defy gravity, it all out worked rather well. Once the arch and dome were complete and left to dry, I unscrewed and broke, cut and swore at the former to come out, thankfully no damage to the oven was done, but there were a few close calls. I used the remains of the former as the basis for a door. I had a two metre length of flue pipe laying around (no I don't live in Steptoe's yard!) that I cut down to make the chimney, I really should have made some way of fixing it to the bricks in the arch of the opening, I only placed it on the former and built the arch around it, with the intention of building a brick chimney around it, but I didn't have enough bricks come the end to do that. The pipe isn't loose in the hole, but I think only a slight bit of effort would rip it from it's home, so this will be classed as 'work in progress' for now. I need to put a hat on the top to stop rain getting in, I have a small disk of plywood placed over the hole at present to keep the elements and curious creatures out.

Any left over morter was used to render the outside of the oven, and I left it like this for a few months before I put a final coat of render on. All morter was hand mixed using a shovel and trowel in a wheelbarrow.

I left the oven for about a week in the heat of the summer to dry completely before I lit the first fire, this being a small one initally as to draw out any moisture that may still be present and not crack the dome, but Russell Jeavons in his book says to just go for it!?! I didn't just 'go for it' but the dome still cracked! Nothing spectacular, a hair line crack around a quarter of the dome a few courses down from the top, after about five full fires I rendered the whole dome and then painted it.

The first proper firing and cooking went okay, the Pizza's tasted amazing, but there were bits of sand in them, I guess the heat loosening it from where I used it to shape the top of the dome. Before the second firing, I went around the inside top of the dome thoroughly with a hand brush to try remove any more loose sand, as good as the pizzas tasted in the first attempt I didn't like the crunchy texture of the sand in it!

To get the pizzas in and out of the oven I cobbled together a temporary spatula out of a wooden broom handle that I found in the garage and a piece of the original circular template cut to shape. I cut a slot in the end of the broom handle and fixed it with two screws and then sanded the front edge of the spatula down to a fine-ish point to be able to scoop up under a pizza. I'll buy a proper one at some point, but this one works okay for now, it needs a finer edge at the front as sometimes it pushes the pizza rather than scoops it, also being wood it does have a tendancy to catch fire if pushed a bit too close to the flames, but I think that adds character to it!

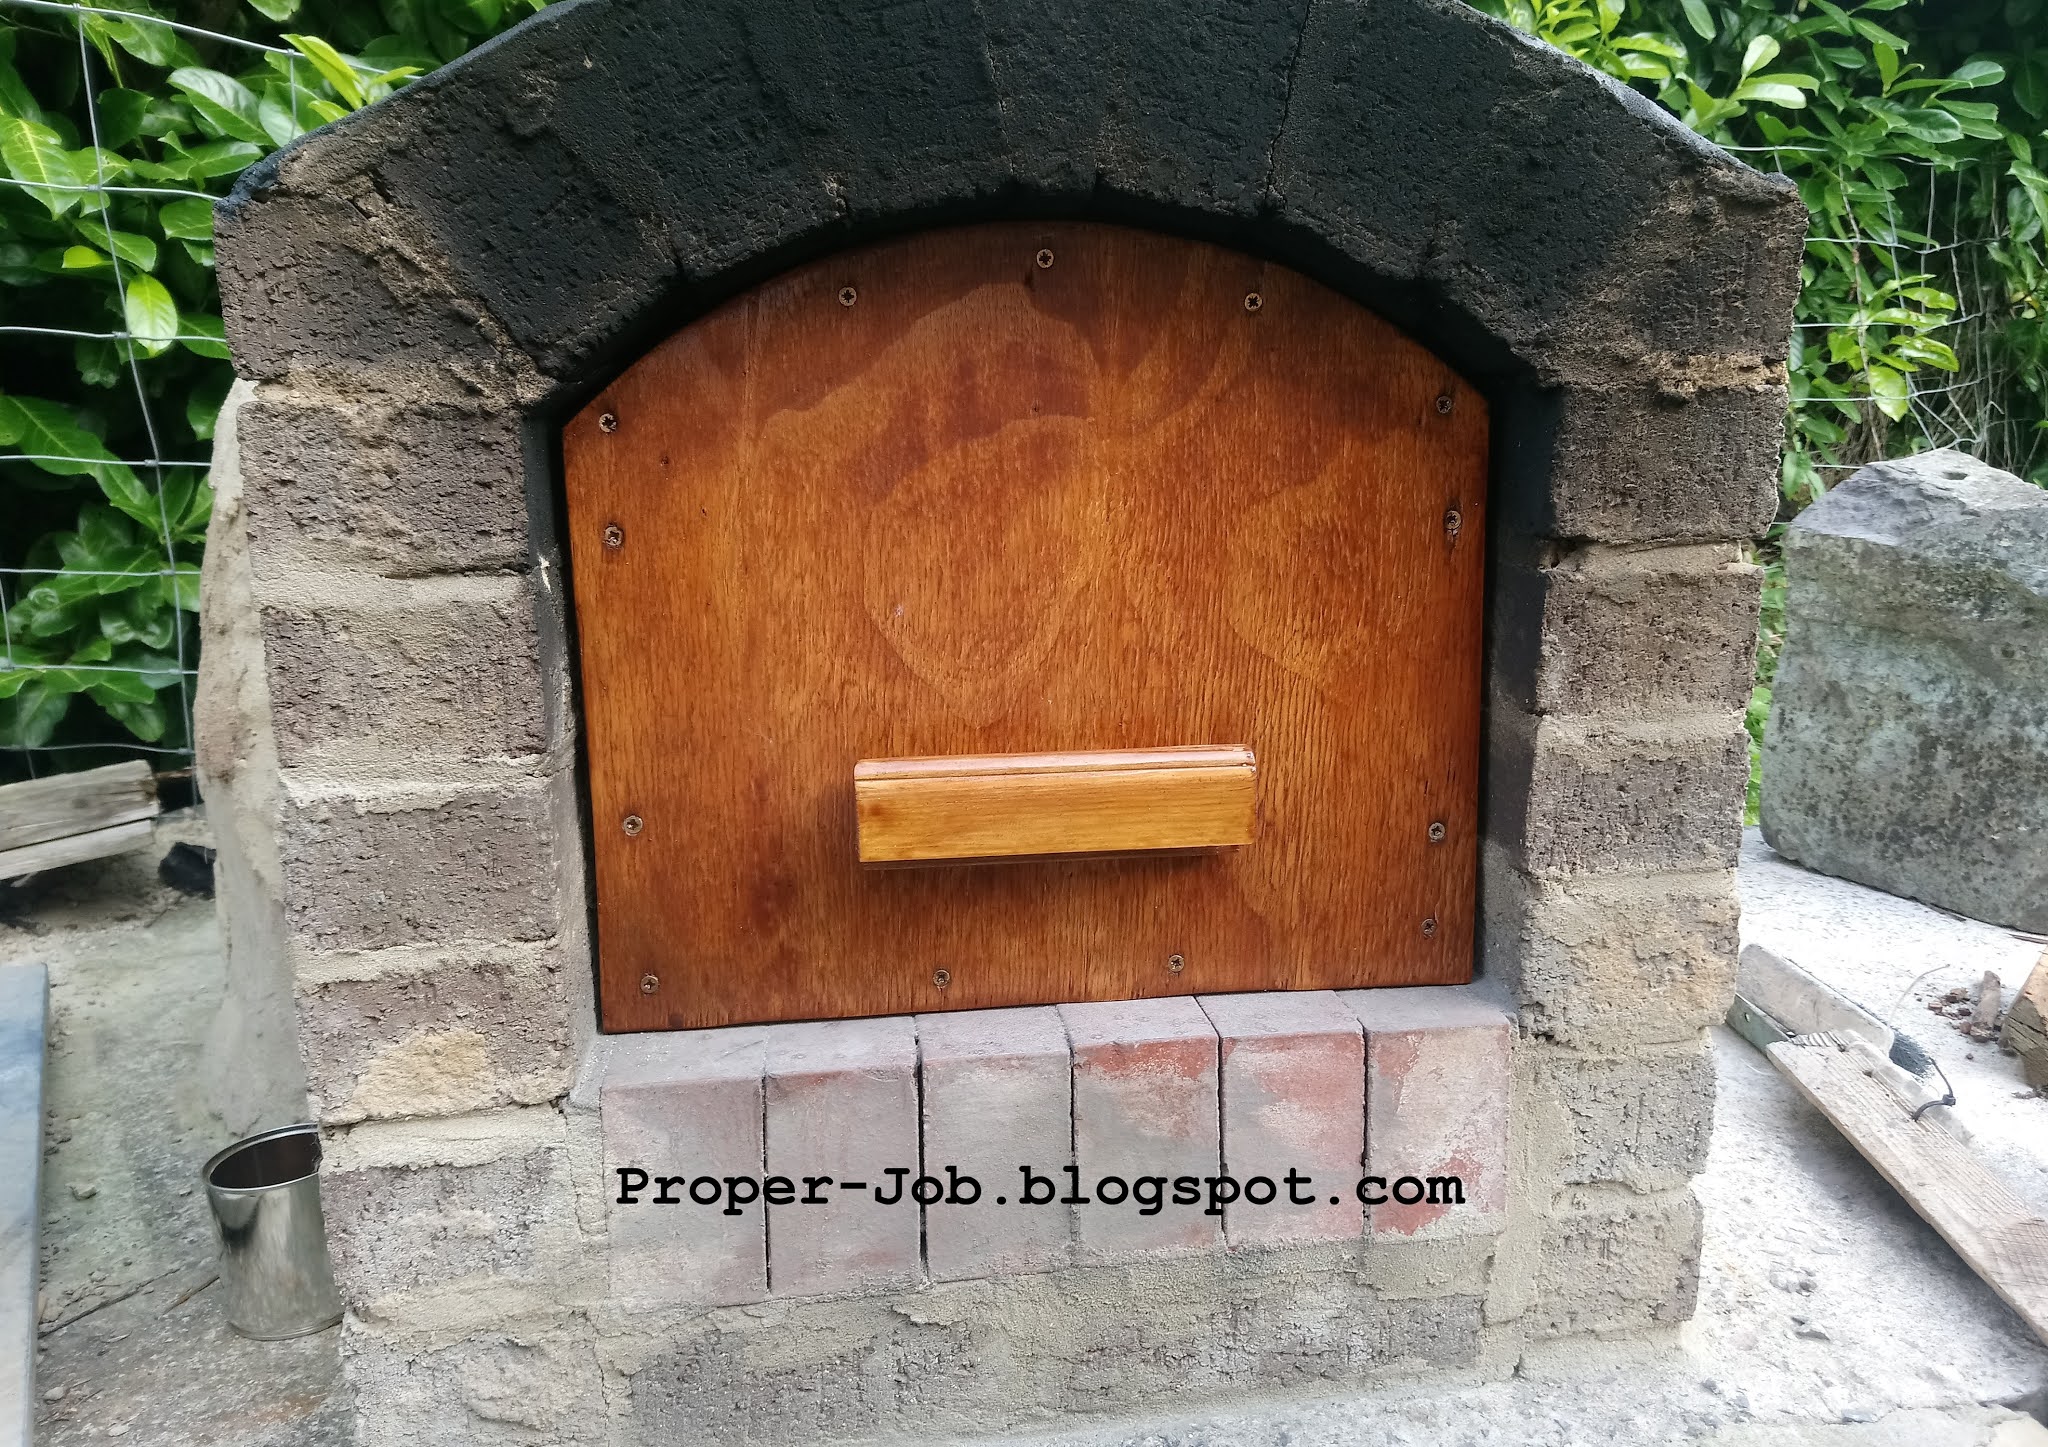
To make a door I used the wood I cut to create the arch former of the opening, them being an almost perfect size, I just cut 5mm off the bottom of the arch boards so it slides in easier and used some of the batten I created the former with as a sandwich filling for the boards. An old window frame was used to make the handle then it was stained. I want to buy a metal handle for it, and some stainless sheet steel to line the inside face of the door with at some point, then use it to try make bread in the oven with.

Currently the oven is rendered and painted with black masonary paint that the previous owner of the house had left behind in a vain attempt to keep it watertight with some, the thinking is that it'll take much longer to warm up if it's completely damp. This doesn't leave a lot of insulation to keep heat in, eventually I will build a wall around the side and back of the oven and cover with a roof of some kind with a insulation in between to keep more heat in as thermal mass.

Below is my door in situ to keep the local wildlife out, door can move back past the chimney opening to close the heat in, I'm hoping we can bake bread in here as well at some point.
Links below to the tools I used, these are not the exact brand of tool, many of the ones I used I've had for many years, some bought, or given to me second hand, some like the jigsaw I bought as refurbished, some had been given to me, but please, beg or borrow tools, buy second hand or buy new local where you can :)
Please note these are affiliate links to amazon if you use the links to purchase thank you! I might get a tiny percentage back which I hope will help fund more projects, or at least finish this one!
https://amzn.to/39uGpD6 - "Your Brick Oven - Building it & Baking in it" by Russell Jeavons
Tools used:
https://amzn.to/2M8dxYE - Lump Hammer
https://amzn.to/36qUNu7 - Bolster Chisel, get one with the plastic guard!
https://amzn.to/2L6MYT6 - Bricklaying Trowel
https://amzn.to/3j0LCFU - Angle Grinder
https://amzn.to/3j14a91 - Stone cutting disc
https://amzn.to/39vcvif - Brushes for moving ash in oven to cook.
https://amzn.to/3oy9bqJ - Electric Jigsaw
#PizzaOven #WoodFiredOven #DIY #Pizza #HomeMade #Yum
Comments
Post a Comment